系统环境
CentOs 7.6
mysql 8
安装包下载
perl-DBD-MySQL
percona-toolkit
Query-Digest-UI
安装
安装perl-DBD-MySQL(连接mysql8需要)
yum install -y perl-DBD-MySQL-4.050-1.el7.x86_64.rpm
安装percona-toolkit
yum install -y percona-toolkit-3.3.0-1.el7.x86_64.rpm
安装Query-Digest-UI
下载
git clone https://github.com/kormoc/Query-Digest-UI.git
移动文件到/var/www/html目录(apache默认根目录),并重命名为slow。
mv Query-Digest-UI /var/www/html/slow
修改配置文件
cd /var/www/html/slow
cp config.php.example config.php
vi config.php
$reviewhost = array(
// Replace hostname and database in this setting
// use host=hostname;port=portnum if not the default port
    'dsn'           => 'mysql:host=localhost;port=13306;dbname=test',
    'user'          => 'monitor',
    'password'      => 'monitor',
// See http://www.percona.com/doc/percona-toolkit/2.1/pt-query-digest.html#cmdoption-pt-query-digest--review
// 表 query_review 为 pt-query-digest --review 操作时生成
    'review_table'  => 'query_review',
// This table is optional. You don't need it, but you lose detailed stats
// Set to a blank string to disable
// See http://www.percona.com/doc/percona-toolkit/2.1/pt-query-digest.html#cmdoption-pt-query-digest--review-history
// 表 query_review_history 为 pt-query-digest --history 操作时生成
    'history_table' => 'query_history',
);
使用
使用pt-query-digest分析日志并将分析结果导入数据库
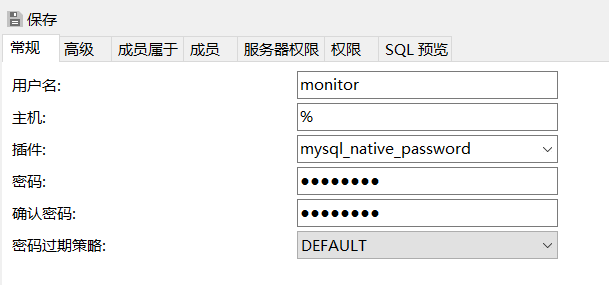
mysql创建新用户并授权,用于存放分析结果 
说明:mysql8采用 caching_sha2_password 方式认证,pt-query-digest不支持,故创建的用户应选用mysql_native_password方式
pt-query-digest --review  h=localhost,P=13306,D=test,u=monitor,p=monitor,t=query_review --create-review-table \
--history  h=localhost,P=13306,D=test,u=monitor,p=monitor,t=query_history --create-history-table \
--no-report --limit=0% --filter=" \$event->{Bytes} = length(\$event->{arg}) and \$event->{hostname}=\"$HOSTNAME\"" mysql-slow.log
Query-Digest-UI使用
问题1:http://192.168.80.230/slow/ 访问不了
原因:Apache HTTP服务默认无法访问,需要启用httpd服务
解决:
yum -y install httpd
systemctl start httpd.service
systemctl enable httpd.service
问题2:php无法解析,显示源码
原因:Apache HTTP服务默认不支持php
解决:
- 查找apache配置文件
find / -name "httpd.conf"
vi /etc/httpd/conf/httpd.conf
- 添加对应的php类型
AddType application/x-httpd-php .php

- 添加针对php的索引
DirectoryIndex index.html index.htm index.php

- 加载php5_module模块
LoadModule php5_module modules/libphp5.so

- 重启 httpd
service httpd restart
- 测试
vi /var/www/html/info.php
<?php
        phpinfo();
?>

问题3:状态码500,不显示错误日志
解决:
vi /etc/php.ini
service httpd restart


问题4:连不上mysql
问题描述:ERROR 2002 (HY000): Can't connect to local MySQL server through socket '/var/lib/mysql/mysql.sock'
解决:虽然早已在/etc/my.cnf中修改过sock文件路径,但仍抛出该异常。没找到原因,故简单粗暴,使用软连接
ln -s /usr/local/mysql8/mysql.sock /var/lib/mysql/mysql.sock
问题5:Warning: strtotime(): It is not safe to rely on the system's timezone settings
原因:php未指定时区
解决:
vi /etc/php.ini
service httpd restart

参考资料
Percona Toolkit工具连接MySQL 8报错的解决方案
关于linux的/var/www/html
linux 下php不解析的解决办法
500错误php
php设置时区
来源:oschina
链接:https://my.oschina.net/u/2945218/blog/4957743
标签:


